现在基本做任何web网站都需要用到CMS(Content Management System),市面上CMS的应用非常多,功能框架也都相对成熟,如果要是自己从头到尾写一套,还是很复杂的…所以决定嵌入一个第三方的CMS系统。
Django社区内发布的开源CMS有40多种,详细测评见如下链接:
https://djangopackages.org/grids/g/cms/
最终我选择了Wagtail,本文接下来将详细介绍嵌入Wagtail的具体操作过程。
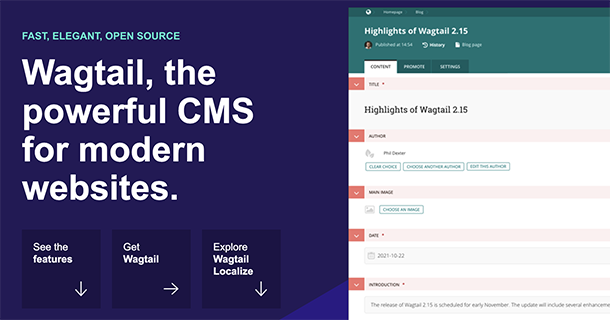
1、Wagtail简介
Wagtail是一套开源CMS系统,目前被Google、NASA、British NHS等机构使用,它有如下优点:
- 面向未来的解决方案:使用Python搭建,而它是目前正在壮大的一门主流编程语言,是数据科学及机器学习的”标准语言“。
- 提供了快速的开发环境:Wagtail能让你快速开发,轻松扩展。
- 安全性:它继承了Django强大的安全处理机制。
- 非常容易与第三方工具集成:能够与你的CRM、订单系统、活动管理系统、支付系统等进行集成。
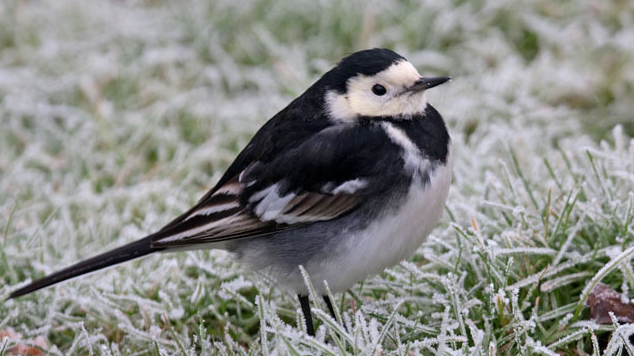
Wagtail名字来源于一种小巧的鸟,叫”鹡鸰“[jí líng],他们从春季开始一直到秋季,每天都在Torchbox(项目开发团队)办公室外的草地上聚集,团队成员很喜欢这种鸟,再加上鸟也非常适合做Logo,所以就以此为名。
2、将Wagtail嵌入到现有Django项目内
Step1、安装Swagtail:
pip install wagtailStep2、增加修改一些配置项
修改settings.py内的INSTALLED_APPS项目,增加如下记录:
'wagtail.contrib.forms',
'wagtail.contrib.redirects',
'wagtail.embeds',
'wagtail.sites',
'wagtail.users',
'wagtail.snippets',
'wagtail.documents',
'wagtail.images',
'wagtail.search',
'wagtail.admin',
'wagtail.core',

'modelcluster',
'taggit',
增加middleware记录:
'wagtail.contrib.redirects.middleware.RedirectMiddleware',设置WAGTAIL_SITE_NAME常量:
WAGTAIL_SITE_NAME = 'My Example Site'设置WAGTAILSEARCH_BACKENDS,支持全局搜索:
WAGTAILSEARCH_BACKENDS = {
    'default': {
        'BACKEND': 'wagtail.search.backends.database',
    }
}
Step3、设置URL
from django.urls import path, include

from wagtail.admin import urls as wagtailadmin_urls
from wagtail.core import urls as wagtail_urls
from wagtail.documents import urls as wagtaildocs_urls

urlpatterns = [
    ...
    path('cms/', include(wagtailadmin_urls)),
    path('documents/', include(wagtaildocs_urls)),
    path('pages/', include(wagtail_urls)),
    ...
]
Step4、在urls.py内,设置Media Root:
from django.conf import settings
from django.conf.urls.static import static

urlpatterns = [
    # ... the rest of your URLconf goes here ...
] + static(settings.MEDIA_URL, document_root=settings.MEDIA_ROOT)
Step5、python3 manage.py startapp **项目名,并将其维护到INSTALLED_APPS内,就完成了项目的嵌入~
3、设计栏目及文章模型
初步来看,站点由如下部分组成:
- 首页:展示给用户推荐的内容;一些动态or热门内容。
- 栏目页:展示每个子栏目下的文章List
- 文章页:展示具体的文章内容。
暂时先不考虑栏目之间的嵌套、打标签等负责的逻辑。
3.1、站点首页
3.1.1、BlogIndexModel
站点首页增加如下字段:
- blog_logo:维护站点Logo
- blog_seo_description:维护站点meta信息内的描述内容,增加SEO效果。
- blog_seo_title:站点meta信息内的title内容。
限定BlogIndex的子页面类型,只能是Category或者是ArticlePage。
并增加一个栏目排序的功能,可以在后台维护栏目在navigator内的排序。
models.py:代码如下:
# 站点首页
class BlogIndex(Page):
    blog_logo = models.ImageField(blank=True)
    blog_seo_description = models.CharField(max_length=250, blank=True)
    blog_seo_title = models.CharField(
        verbose_name=_('SEO Title'),
        max_length=30,
        blank=True,
    )

    content_panels = Page.content_panels + [
        FieldPanel('blog_logo'),
        FieldPanel('blog_seo_description'),
        FieldPanel('blog_seo_title'),
    ]

    # 限定父类和子类
    parent_page_types = []
    subpage_types = ['blog.Category', 'BlogArticlePage']

    def get_context(self, request, *args, **kwargs):
        context = super().get_context(self, request, *args, **kwargs)
        menu_items = self.get_children().live().in_menu().specific()
        categories = []
        for m in menu_items:
            categories.append(m)
        categories.sort()
        context['categories'] = categories
        return context

    class Meta:
        verbose_name = _('首页')
这里面有一个小细节,就是栏目的排序,因为是想依据自定义的Category模型里的c_order字段进行排序,而Page模型重写了sort_by()方法,只能按照BasePage里面带的字段进行排序,不能用自定义模型内新增加的字段排序,所以定义了Category模型中的__lt__方法如下,并在BlogIndex的get_context方法内重写了排序。
class Category内的__lt__方法:
# 排序
    def __lt__(self, other):
        return self.c_order < other.c_order
3.1.2、模板层
模板blog_index.html:
<body>
    <p>title:{{page.title}}</p>
    <p>logo: {{ page.blog_logo }}</p>
    <p>seo-description:{{ page.blog_seo_description }}</p>
    <p>seo-title:{{ page.blog_seo_title }}</p>
    <p>ower:{{ page.owner }}</p>
    <p>first_published_at:{{ page.first_published_at }}</p>
    <p>last_published_at:{{ page.last_published_at }}</p>
    <p>login_user:{{user}}</p>
    <p>子栏目:
        <ul>
        {% for c in categories %}
            {% with category=c.specific %}
                <li><a href="{{ category.url }}">{{ category.title }}</a></li>
            {% endwith %}
        {% endfor %}
        </ul>
    </p>
</body>
3.2、站点栏目页
3.2.1、Model层
考虑到不同栏目的内容结构差异蛮大,希望不同的栏目使用不同的模板,呈现出不同的形态。所以定义了c_type字段,用来指向不同栏目的模板文件,通过定义get_template方法来实现:
# 选择对应的模板:
    def get_template(self, request, *args, **kwargs):
        if self.c_type:
            return self.c_type
        else:
            return 'blog/blog_category.html'
整体的方法如下所示:
# 栏目页
class Category(Page):
    c_description = models.CharField(
        verbose_name=_('Article Category Description'),
        max_length=255,
        blank=True,
        help_text=_("This is the description of this category")
    )
    c_logo = models.ImageField(blank=True)
    c_order = models.IntegerField(blank=True, default=99)
    c_type = models.CharField(
        verbose_name=_('Template file name.'),
        max_length = 255,
        help_text="Choose the template file.",
        blank=True,
    )

    content_panels = Page.content_panels + [
        FieldPanel('c_description'),
        FieldPanel('c_logo'),
        FieldPanel('c_order'),
        FieldPanel('c_type'),
    ]

    # 限定父类和子类
    parent_page_types = ['blog.BlogIndex', 'blog.Category']
    subpage_types = ['blog.Category', 'BlogArticlePage']

    # 选择对应的模板:
    def get_template(self, request, *args, **kwargs):
        if self.c_type:
            return self.c_type
        else:
            return 'blog/blog_category.html'

    # 定义Context信息:
    def get_context(self, request, *args, **kwargs):
        # 修改文章的排序
        context = super(Category, self).get_context(request)
        blog_pages = self.get_children().live().order_by('-first_published_at')
        context['blog_pages'] = blog_pages
        return context

    # 排序
    def __lt__(self, other):
        return self.c_order < other.c_order

    class Meta:
        verbose_name = _('栏目页')
3.2.2、模板层
blog_category.html:
<body>
<h1>{{ page.title }}</h1>
<p>文章列表:
<ul>
    {% for p in blog_pages %}
    {% with page=p.specific %}
    <li>
        <p><a href="{{ page.url }}">{{ page.title }}</a></p>
        <p>{{ page.blog_post_date }}</p>
    </li>
    {% endwith %}
    {% endfor %}
</ul>
</p>
<p><a href="{{ page.get_parent.url }}">返回</a></p>
</body>
3.3、文章页
文章页的逻辑很简单:
3.3.1、Model层
# 基础文章页
class BlogArticlePage(Page):
    # 发布日期
    blog_post_date = models.DateField("发布日期")
    # 是否首页推荐
    blog_index_recommendation = models.BooleanField(
        blank=False,
        default=False,
        verbose_name=_('是否首页推荐'),
        help_text=_('勾选后会在首页显示出来'),
    )
    # 剪短介绍
    blog_intro = models.CharField(
        max_length=250,
        blank=True,
        verbose_name=_('简介'),
    )
    # 主要内容
    blog_body = RichTextField(
        blank=True,
        verbose_name=_('内容'),
    )
    # 转载自
    blog_from_url = models.URLField(
        blank=True,
        verbose_name=_('来源链接')
    )
    # 转载自的文字描述
    blog_from_desc = models.CharField(
        blank=True,
        max_length=200,
        verbose_name=_('来源描述')
    )

    # 搜索项
    search_fields = Page.search_fields + [
        index.SearchField('blog_intro'),
        index.SearchField('blog_body'),
    ]

    # 管理后台的内容
    content_panels = Page.content_panels + [
        FieldPanel('blog_post_date'),
        FieldPanel('blog_index_recommendation'),
        FieldPanel('blog_intro'),
        FieldPanel('blog_body', classname='full'),
        FieldPanel('blog_from_desc'),
        FieldPanel('blog_from_url'),
    ]

    # 限定父类和子类
    parent_page_types = ['blog.BlogIndex', 'blog.Category']
    subpage_types = []

    class Meta:
        verbose_name = _('基础文章页')
3.3.2、模板层
<body>
{% block content %}
<h1>{{ page.title }}</h1>
<p>来源:<a href="{{ page.blog_from_url }}">{{ page.blog_from_desc }}</a> </p>
<p class="meta">{{ page.blog_post_date }}</p>
<div class="intro">{{ page.blog_intro }}</div>
{{ page.blog_body|richtext }}
<p><a href="{{ page.get_parent.url }}">返回</a></p>
{% endblock %}
</body>
4、修改Wagtail默认的首页
当将wagtail迁移到一个已经存在的Django应用的时候,它会自动创建一个“homepage”,作为默认的首页,关联到page模型,但是它只有一个title字段。有两种办法修改默认的homepage,指向自己自定义的IndexModel:
方法1:官网推荐方法:
在管理后台,设置-站点,将根页面由默认的homepage改为我们创建的indexModel对应的一个页面。
这个方法的优点是很简单,但是缺点是原来的自动生成的homepage依旧存在,会让强迫症不爽。
方法2:修改自动生成的homepage指向的模型:
这种方法涉及到数据库的修改,请在操作前做好数据库备份。
Step1:
修改wagtailcore_page表内,默认添加的Homepage这条记录的【content_type_id】字段,它的默认值是1,将其修改为你创建的IndexModel对应的content_type_id,这个值是可以在django_content_type表内找到的。
Step2:
在你新建的IndexModel对应的表内,增加一条【page_ptr_id】=2的记录,指向默认创建的homepage。
进行完这两步操作就可以啦~
5、打标签的功能
希望增加给文章打标签的功能,这样读者在阅读一篇文章的时候,就可以去看所有相关的内容了,为了达成打标签的目的,我们需要唤起Wagtail系统内的tagging系统,将它绑定到BlogArticlePage模型,及content panel内;将与文章相关的标签渲染在文章模板页内,最后,再创建一个去查看特殊标签的页面。
5.1、添加对应的model
在models.py内:
需要引入依赖类:
from modelcluster.fields import ParentalKey
from modelcluster.contrib.taggit import ClusterTaggableManager
from taggit.models import TaggedItemBase
定义tag与content对应关系类:
class BlogPageTag(TaggedItemBase):
    content_object = ParentalKey(
        'BlogPage',
        related_name='tagged_items',
        on_delete=models.CASCADE
    )
在现有的BlogArticlePage内增加与标签的关联关系:
class BlogPage(Page):
    # ...

    tags = ClusterTaggableManager(through=BlogPageTag, blank=True)

    # ... (Keep the main_image method and search_fields definition)

    content_panels = Page.content_panels + [
        MultiFieldPanel([
            FieldPanel('date'),
            FieldPanel('tags'),
        ], heading="Blog information"),
     # ...

    ]
做完以上的修改之后,makemigrations,migrate,之后就可以在文章页内编辑标签了。
5.2、修改template,在文章详情页展示对应的标签
在blog_article_page.html内,增加如下片段:
{% if page.tags.all.count %}
    <div class="tags">
        <h3>Tags</h3>
        {% for tag in page.tags.all %}
            <a href="{% slugurl 'tags' %}?tag={{ tag }}"><button type="button">{{ tag }}</button></a>
        {% endfor %}
    </div>
{% endif %}
在这里我们用的是slugurl,而不是pageurl,它们的差异是slugurl获取了在文章编辑页的【推荐】tab内的slug参数;而page会避免额外的数据库查询。因为在这儿,Page实体并不是真实的存在,所以我们使用slugurl。
现在,我们访问每个文章页面的时候,都可以看到你在后台维护的一列与这个文章相关的标签。但是现在你点击任意标签的时候,都会显示404,原因是我们还没有定义一个“tags”的view层。
在modesl.py内增加如下内容:
class BlogTagIndexPage(Page):

    def get_context(self, request):

        # Filter by tag
        tag = request.GET.get('tag')
        blogpages = BlogPage.objects.filter(tags__name=tag)

        # Update template context
        context = super().get_context(request)
        context['blogpages'] = blogpages
        return context
注意这个方法并没有定义自己的字段,甚至它都没有字段,它只是Page的一个子类,但因为它继承自Page,所以你可以给它设置一个title,并且可以在后台配置它的title和基于slug的url。
接下来,makemigrations,migrate,然后在后台创建一个BlogTagIndexPage的页面,建议你将它创建为首页的子页面,给它的slug赋值为“tags”。(这一步很重要,我之前就是没做好这一步,导致页面一直404).
接下来,我们新增blog_tag_index_page.html,内容如下:
{% extends "base.html" %}
{% load wagtailcore_tags %}

{% block content %}

    {% if request.GET.tag %}
        <h4>Showing pages tagged "{{ request.GET.tag }}"</h4>
    {% endif %}

    {% for blogpage in blogpages %}

          <p>
              <strong><a href="{% pageurl blogpage %}">{{ blogpage.title }}</a></strong><br />
              <small>Revised: {{ blogpage.latest_revision_created_at }}</small><br />
              {% if blogpage.author %}
                <p>By {{ blogpage.author.profile }}</p>
              {% endif %}
          </p>

    {% empty %}
        No pages found with that tag.
    {% endfor %}

{% endblock %}